Chopper motorcycles are known for their unique design and powerful performance on the road. However, ensuring the safety of these machines requires regular maintenance and inspection, particularly when it comes to the crucial component of brakes. Neglecting brake maintenance can have serious consequences, compromising not only the rider’s safety but also the overall functionality of the motorcycle.
Consider this hypothetical scenario: John is an avid chopper motorcycle enthusiast who loves taking long rides on his prized possession. One day, as he was cruising down a winding mountain road, he noticed that his bike’s braking system felt sluggish and unresponsive. Ignoring this warning sign could lead to disastrous outcomes such as loss of control or accidents. This case study illustrates the importance of conducting routine brake inspections to identify any potential issues and address them promptly before they escalate into more significant problems. In this article, we will explore some key maintenance tips for inspecting chopper motorcycle brakes effectively, ensuring optimal performance and enhancing rider safety on the road.
Importance of Regular Brake Inspections
Importance of Regular Brake Inspections
Imagine cruising down the open road on your chopper motorcycle, feeling the wind in your face and the thrill of freedom. Suddenly, a deer darts out from the bushes, causing you to slam on your brakes to avoid a collision. But what if those brakes fail? This hypothetical scenario highlights the critical importance of regular brake inspections for every motorcycle rider.
To begin with, regular brake inspections ensure that your motorcycle’s braking system is functioning optimally. A well-maintained brake system provides reliable stopping power when it matters most, contributing to overall safety on the road. Without routine inspections, minor issues such as worn brake pads or leaking brake fluid may go unnoticed until they become major problems. By conducting thorough examinations at scheduled intervals, riders can prevent potential accidents caused by faulty brakes.
Furthermore, adhering to a regular inspection schedule helps prolong the lifespan of your motorcycle’s braking components. Over time and through normal usage, various parts of the braking system can wear down or experience deterioration. By identifying these signs early on during inspections, necessary repairs or replacements can be made promptly before more extensive damage occurs. This proactive approach not only ensures continued performance but also saves money in the long run by avoiding costly repairs resulting from neglect.
Consider this bullet point list illustrating some emotional reasons why regular brake inspections are crucial:
- Peace of mind knowing that your brakes are in optimal condition.
- Confidence while riding due to enhanced control and responsiveness.
- Protection against potentially life-threatening accidents caused by brake failure.
- Preservation of your investment by preventing expensive damage to other parts of the motorcycle.
In addition to bullet points, let us examine a table showcasing four essential aspects related to brake inspections:
| Aspect | Importance | Benefits |
|---|---|---|
| Safety | Ensures reliable stopping power | Prevents accidents due to faulty brakes |
| Performance | Maintains optimal braking efficiency | Enhances control and responsiveness |
| Cost-effectiveness | Avoids expensive repairs resulting from neglect | Saves money by preventing damage to other components |
| Longevity | Prolongs lifespan of braking system | Preserves investment in the motorcycle |
In conclusion, regular brake inspections are an essential aspect of responsible motorcycle ownership. By ensuring that your chopper’s brakes are functioning optimally, you can ride with confidence and peace of mind, knowing that you have taken necessary precautions to protect yourself and others on the road.
Signs of Brake Wear to Look Out For
Chopper Motorcycle Brake Inspection: Maintenance Tips
Importance of Regular Brake Inspections:
Regular brake inspections are crucial for maintaining the safety and performance of your chopper motorcycle. Neglecting to inspect your brakes can lead to potential accidents, increased stopping distances, and a compromised riding experience. To highlight the significance of regular brake inspections, let’s consider a hypothetical scenario.
Imagine you are cruising down a winding road on your chopper motorcycle when suddenly, a deer jumps out in front of you. With only seconds to react, you quickly apply the brakes but notice that they are not responding as effectively as they should. This delay could be due to worn-out brake pads or other underlying issues that went unnoticed during routine inspections. As a result, you may find yourself unable to stop in time, leading to a collision or loss of control.
Signs of Brake Wear to Look Out For:
To ensure optimal braking performance, it is essential to keep an eye out for signs of brake wear. By promptly addressing these indicators, you can prevent potential hazards on the road. Here are some key signs that indicate your chopper motorcycle’s brakes may require attention:
- Squealing or grinding noises when applying the brakes
- Increased pedal travel before the brakes engage
- Vibrations or pulsating sensations while braking
- Uneven pad wear or reduced thickness
By recognizing these warning signs and taking appropriate action, you can maintain reliable braking power and enhance overall safety while riding.
- A well-maintained set of brakes instills confidence and peace of mind.
- Regular inspections help avoid costly repairs caused by neglecting brake maintenance.
- Properly functioning brakes reduce the risk of accidents and injuries.
- Investing time in checking your chopper motorcycle’s brakes ensures a smoother riding experience.
Table – Common Signs of Brake Wear:
| Sign | Description |
|---|---|
| Squealing or Grinding | High-pitched noises or metallic grinding sounds when applying the brakes |
| Increased Pedal Travel | Requiring more pressure on the pedal before the brakes engage, resulting in longer stopping distances |
| Vibrations/Pulsations | Feeling vibrations or pulsating sensations through the brake pedal while braking |
| Uneven Pad Wear | Irregular wear patterns on the brake pads, such as one pad being significantly thinner than others |
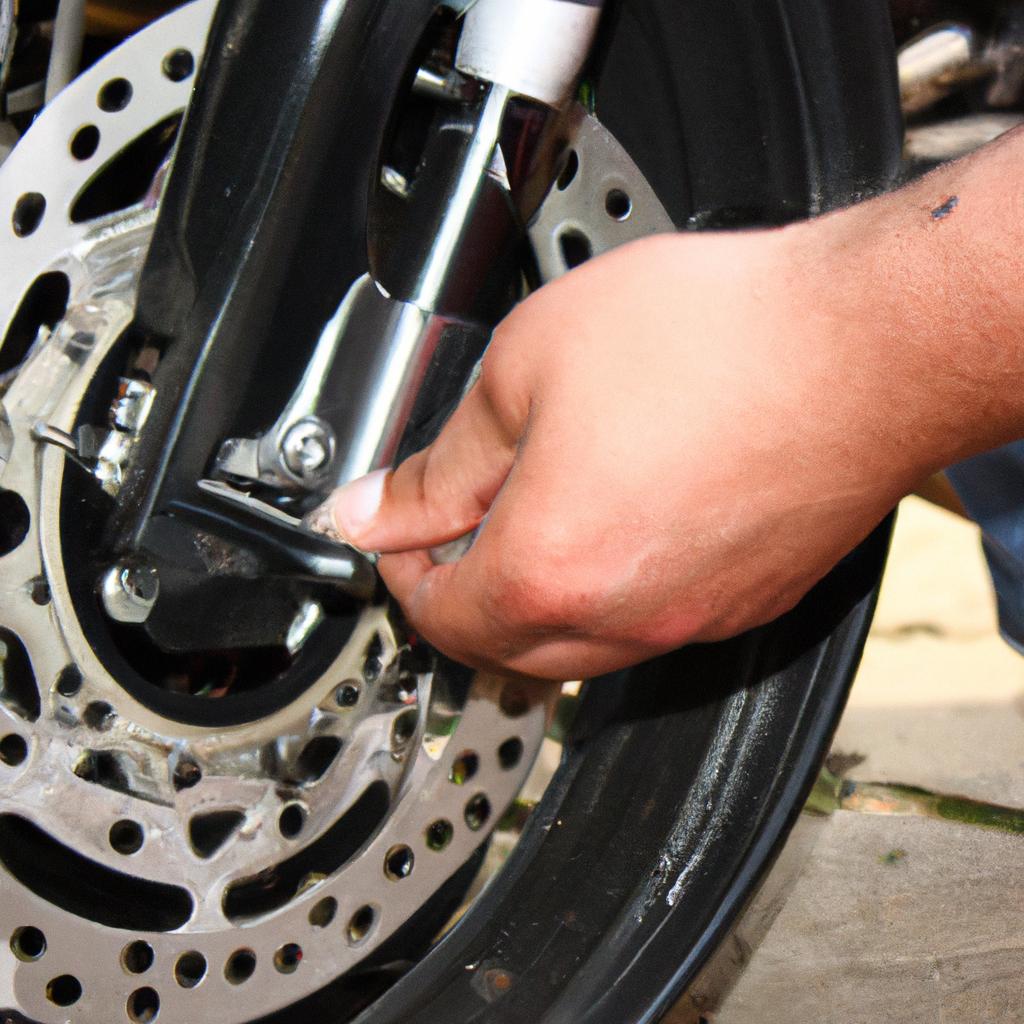
Step-by-Step Guide to Inspecting Brake Pads:
Continuing our discussion on chopper motorcycle brake maintenance, let’s now delve into a step-by-step guide for inspecting your brake pads. While regular inspections are crucial, knowing how to properly assess and identify any issues will help you take appropriate action promptly. So, let’s explore this process together.
Step-by-Step Guide to Inspecting Brake Pads
Chopper Motorcycle Brake Inspection: Maintenance Tips
Now that we have discussed the signs of brake wear to look out for, let’s delve into a step-by-step guide to inspecting brake pads. To help you better understand this process, consider the following example: Imagine you are preparing for an exhilarating ride on your chopper motorcycle when suddenly you notice a squealing sound whenever you apply the brakes. This could be an indication that your brake pads are worn and in need of inspection or replacement.
Inspecting Brake Pads: Step-by-Step Guide
To ensure optimal performance and safety while riding your chopper motorcycle, it is crucial to regularly inspect your brake pads. Follow these steps to effectively examine their condition:
- Gather the necessary tools: Before beginning the inspection, gather a flashlight, gloves, and a ruler or caliper tool.
- Remove the wheel assembly: Carefully remove the wheel assembly from your motorcycle using appropriate tools and techniques as recommended by your manufacturer.
- Examine the brake pad thickness: Shine the flashlight onto each brake pad surface and visually assess their thickness. Alternatively, use a ruler or caliper tool to measure their depth accurately.
- Check for uneven wear patterns: Inspect both sides of each brake pad for any signs of uneven wear such as grooves or indentations.
By diligently following these steps during your regular maintenance routine, you can identify any potential issues with your bike’s brake system promptly. Ensuring well-maintained brakes will not only enhance performance but also provide peace of mind during those adrenaline-filled rides.
Having inspected the condition of your brake pads thoroughly, now let’s move on to another essential aspect of chopper motorcycle maintenance – checking brake fluid levels and quality.
Checking Brake Fluid Levels and Quality
Chopper Motorcycle Brake Inspection: Maintenance Tips
Inspecting brake pads is an essential task when it comes to ensuring the safety and performance of your chopper motorcycle. In the previous section, we discussed a step-by-step guide on how to inspect brake pads effectively. Now, let’s move on to another crucial aspect of brake maintenance: checking brake fluid levels and quality.
Imagine you’re cruising down the highway on your chopper motorcycle, enjoying the freedom and thrill that riding brings. Suddenly, you need to stop abruptly due to unexpected road conditions. Without properly functioning brakes and adequate brake fluid levels, this scenario could quickly turn into a dangerous situation.
To maintain optimum braking efficiency, here are some key points to keep in mind:
- Regularly check brake fluid levels: Insufficient brake fluid can lead to diminished stopping power or even complete failure of the brakes. Use the manufacturer’s recommended type of brake fluid and ensure that it meets the required specifications.
- Look for signs of contamination: Contaminated brake fluid can negatively impact braking performance by causing corrosion or affecting the hydraulic system’s functionality. Check for discoloration, cloudiness, or particles in the fluid.
- Consider replacing old brake fluid: Over time, brake fluid absorbs moisture from its surroundings which can lower its boiling point and affect overall performance. It is generally recommended to replace the brake fluid every 1-2 years depending on usage and environmental factors.
- Bleed the brakes if necessary: Air bubbles trapped in the hydraulic system can result in spongy brakes or reduced effectiveness. If you notice such symptoms or after any repairs involving opening up the system, bleeding may be required.
Here is an emotional bullet-point list highlighting potential consequences of neglecting proper brake maintenance:
- Increased risk of accidents
- Reduced control during emergency stops
- Premature wear on other components like rotors or calipers
- Expensive repair costs due to extensive damage
Now let’s take a look at the table below, which summarizes common brake fluid types and their recommended replacement intervals:
| Brake Fluid Type | Recommended Replacement Interval |
|---|---|
| DOT 3 | Every 1-2 years |
| DOT 4 | Every 2 years |
| DOT 5.1 | Every 3 years |
By regularly inspecting brake pads and monitoring brake fluid levels and quality, you can ensure optimal braking performance for your chopper motorcycle.
Moving forward in our maintenance routine, let’s explore the crucial task of examining brake lines and connections without further delay.
Examining Brake Lines and Connections
Section H2: Examining Brake Lines and Connections
After ensuring that the brake fluid levels and quality are up to par, it is crucial to shift our attention towards examining the motorcycle’s brake lines and connections. Neglecting these components can result in suboptimal braking performance or even compromise safety on the road.
Paragraph 1:
To illustrate the importance of inspecting brake lines and connections, let us consider a hypothetical scenario where a rider experiences weak braking power while riding downhill at high speeds. Upon inspection, it is discovered that one of the brake lines has developed a small crack due to wear and tear over time. This compromised connection leads to fluid leakage, resulting in diminished hydraulic pressure within the braking system.
Paragraph 2 (Bullet Point List):
When evaluating your motorcycle’s brake lines and connections, keep in mind the following maintenance tips:
- Regularly check for signs of wear or damage such as cracks, bulges, or leaks.
- Ensure that all fittings are properly tightened without any visible signs of corrosion.
- Inspect flexible rubber hoses for deterioration or fraying.
- Verify that there are no kinks or blockages along the length of the brake lines.
Table:
Here is an example table showcasing different types of issues you may encounter when inspecting your motorcycle’s brake lines and connections:
| Issue | Description | Possible Consequences |
|---|---|---|
| Cracked Brake Line | Small fractures along the line due to aging | Fluid leakage leading to reduced braking |
| Loose Connection | Improperly secured fitting between components | Loss of hydraulic pressure |
| Corroded Fitting | Oxidation buildup on metal connectors | Weakened structural integrity |
| Frayed Rubber Hose | Worn-out material with visible threads coming apart | Reduced flexibility leading to failure |
Paragraph 3:
By diligently examining your motorcycle’s brake lines and connections, you can identify potential issues before they escalate into major problems. Regular maintenance not only ensures optimal braking performance but also enhances overall rider safety. With the knowledge gained from this inspection, we can now move on to testing the brake system for proper functioning.
Having thoroughly assessed the condition of the brake lines and connections, it is now imperative to proceed with testing the entire brake system for its proper functioning.
Testing the Brake System for Proper Functioning
Section H2: Examining Brake Lines and Connections
Transitioning from the previous section, where we discussed the importance of examining brake lines and connections in a chopper motorcycle brake inspection, let us now turn our attention to testing the brake system for proper functioning. To further illustrate the significance of this step, consider the following scenario:
Imagine cruising down an open highway on your chopper motorcycle when suddenly you encounter an unexpected obstacle. Reacting swiftly, you reach for the brakes only to discover that they are unresponsive. This harrowing situation emphasizes the criticality of regularly testing your brake system’s functionality.
To ensure optimal performance and safety, here are some key steps to follow during a brake system test:
- Begin by visually inspecting all components: Check for signs of wear or damage such as leaks, corrosion, or loose fittings.
- Test each individual brake lever: Apply gradual pressure to both front and rear levers while observing if the calipers engage smoothly without any delay or excessive force required.
- Evaluate braking efficiency: Find a safe location devoid of traffic and perform controlled stops at different speeds. Pay close attention to how quickly your chopper comes to a halt and whether it pulls to one side.
- Assess responsiveness: While riding at moderate speed, lightly tap each brake lever separately to gauge their responsiveness. A slight movement should lead to prompt engagement without hesitation.
By adhering to these steps diligently, you can mitigate potential risks associated with faulty brakes. Remember that maintaining regular inspections not only ensures rider safety but also extends the lifespan of vital braking components.
| Braking Component | Signs of Wear/Damage | Recommended Action |
|---|---|---|
| Brake pads | Thinning or uneven surface | Replace immediately |
| Brake rotors | Deep grooves or scoring | Resurface or replace as needed |
| Brake fluid | Dark color or low level | Flush and refill with new fluid |
| Brake lines | Cracks, bulges, or leaks | Replace affected parts |
Incorporating these maintenance practices into your routine will provide peace of mind while riding. As responsible chopper motorcycle enthusiasts, we must prioritize the safety of ourselves and others on the road. Regular testing and inspections are vital in ensuring that our brake systems function optimally when needed most.
Remember, a well-maintained brake system is not only crucial for your own protection but also contributes to an overall enjoyable riding experience. So take the time to conduct thorough tests periodically and address any issues promptly – because when it comes to brakes, reliability should never be compromised.
Comments are closed.